
Follow In The Country...

Growing Hosta Seedlings
The basics of growing Hosta seedlings indoors under lights.
By Joshua Spece
Last revised February 6, 2008
Once Hosta seeds sprout, caring for them is pretty straight forward. Compared to many other plants, Hostas are slow growing from seed. A proper growing environment and care can accelerate their growth.
Light
The light that young Hosta seedlings receive may play the largest role in their growth. Light is the driving force for all plants. Contrary to popular belief, Hostas are not shade lovers. They thrive in the sun. It is the heat that they can not tolerate. The more light Hostas receive, the faster they grow - provided they are not allowed to over heat and burn severely.
Fluorescent Lighting

Courtesy Mike Soska
You will quickly discover there is an overwhelming array of different fluorescent tubes. Different watts, different color temperatures, warm white, cool white, and even tubes designed specifically for growing plants. Long term, certain tubes may grow a better plant, but the Hosta seedlings are only going to be under artificial light for a few months. Most hybridizers find that "cool white" tubes work just fine. They are also very inexpensive.
The biggest drawback to fluorescent lights is that as you move further from the tubes, the light intensity diminishes dramatically. Roughly, when you double the distance from the bulb the intensity is reduced by 75 percent. To promote sturdy growth, fluorescent tubes should be as close as possible to the leaves. Within two inches is ideal. There is little chance of fluorescent tubes burning Hostas.
Light output drops quite rapidly as the fluorescent tubes age. It is seldom apparent until a new tube and old tube are lit side by side. Tubes should be replaced yearly to maintain intensity.
High Intensity Discharge (HID) Lighting
A few die-hard Hosta hybridizers enjoy the robust growth that high intensity discharge (HID) lighting provides. The two different types of HID lighting most common among plant growers are high pressure sodium (HPS) and metal halide.

Courtesy Jeff White
The advantage of HID lights is the amount of light they produce. Metal halide bulbs are commonly available in 400 watt and 1000 watt strength. That is 10 to 25 times the light output of a single fluorescent tube! Depending on the wattage, a single HID lamp is strong enough to light at least a 3 foot by 3 foot area (9 square feet).
Along with increased light, HID lights also produce much more heat than fluorescent lights. It is easy to burn plants with HID lights if they are too close to the plants. HID lights are typically hung about three feet above the Hostas.
Another drawback of high intensity discharge lights is the cost. Not only is the initial investment in equipment expensive, but due to the high power consumption it can be costly to run the lights.
High intensity discharge lights aren't for every hybridizer. The people who use them usually use fluorescent lights until the Hosta seedlings are large enough to be potted individually. Hosta seedlings grown under HID lights often grow large enough to fill a gallon pot by spring. Many bloom before fall.
Photoperiod
The length of time that the lights are on is known as the photoperiod. The standard photoperiod for growing plants under lights is 16 hours on, 8 hours off. A timer comes in handy and frees you from having to remember to turn the lights on and off every day. Under this schedule, Hosta seedlings grow at a steady pace.
Plants normally require a dark period. Without a period of darkness stems become leggy, leaves are distorted, flowering decreases, and over-all plant health declines. In the mid 1980's, Jim Wilkins discovered this is not the case with Hosta seedlings. In fact, constant light results in a greatly accelerated growth rate. It is common practice for hybridizers - pushing for maximum growth - to grow Hosta seedlings under 24/7 light.
The extra electricity consumed, especially when using HID lights, should be considered when deciding on the best photoperiod for your circumstances. Space can also be an issue. Do you have enough space indoors to grow larger seedlings? If indoor growing space is limited, a standard 16/8 photoperiod may work best.
Reflecting Lost Light
Regardless of the photoperiod and type of lights you use, a portion of the light will pour out into the room and be wasted. To make the most of the light produced, reflective materials can be used to recapture the light and bounce it back onto the plants.
White walls will do this fairly well, as will aluminum foil. Mylar sheeting, with its smooth, mirrored surface, can be purchased in rolls and used to surround your growing area. Emergency or solar blankets are just as reflective. These blankets can be found in the camping department of any big box store for a fraction of the cost of Mylar.
Completely surrounding a light shelf can cause two areas of concern: heat buildup and air circulation. Excessive temperatures can stress Hostas and increase evaporation and transpiration. The seedlings will need to be watered more often at warmer temperatures. If you completely surround your growing area with reflective material, keep a very close eye on the temperature until you are certain the area won�t over heat. Even fluorescent light fixtures can keep an enclosed area surprisingly warm. Ideally, Hostas prefer temperatures between 65 and 75 degrees Fahrenheit. Stagnant air is also problematic and can lead to fungal diseases and tender, soft growth. A small fan will keep the air moving and help dissipate excess heat.
Water
Hosta seedlings should never be allowed to dry out. Constant moisture is especially critical from the time the seed is planted, until the seedling has grown a number of leaves and developed a strong root system. Tiny seedling just can't store enough water to survive drying out without damage.
At the other extreme, water logged planting mix can be troublesome, too. Excessive moisture can lead to disease outbreaks, insect infestations, algae growth, and root suffocation. Hostas thrive in a coarse potting mix that allows plenty of oxygen to their roots.
It is beneficial to allow the surface of the potting mix to dry slightly between waterings. This simple practice will go a long way to help prevent problems resulting from water logged planting mix.
Water directly from the tap is usually suitable for Hosta seedlings. Hostas are quite tolerant of a wide range of water qualities. If your water is high in dissolved salts and minerals, this can lead to problems over time. Excess salts and minerals can build up in the potting mix and cause leaf tips and edges to burn. It is always good to water until water runs from the drainage holes. This flushes the potting mix and will help prevent salt and mineral build-up. Repotting regularly with fresh potting mix will also help.
Water pH
A few devoted hybridizers adjust the pH of their water. At the ideal pH of 6.4, nutrients are most readily available to the plants. As the pH drifts further from 6.4, certain nutrients are locked up and un-usable to the plants. Chlorosis, or yellowing of the leaves between the veins, can be a sign of a pH imbalance. This is rarely detrimental to Hostas and they usually outgrow it.
Courtesy Jeff Moore
If the pH of your water is below 6.4, you will need to add a base to raise the pH. Sodium bicarbonate (common household baking soda) is a suitable base. There are also "pH Up" solutions sold for aquariums and hydroponics than you can use.
It is likely that your pH is higher than 6.4 and will need to be lowered with an acid. A commercial "pH Down" solution may be the safest way to lower pH. These solutions are dilute acid. Battery electrolyte (sulfuric acid) from your local auto store is a fraction of the price of "pH Down," but is more dangerous to handle. Common Miracle-Gro fertilizer will also lower pH to a lesser degree.
Once you determine what direction the pH of your water needs to be adjusted, it is just a matter of adding a bit of the appropriate chemical and re-testing. Use a given amount of water (1 gallon, 5 gallons, etc.) and keep track of how much chemical is needed to reach the desired pH. Once you know how much chemical is needed to adjust a given volume of water, you won't need to test the water every time you need to prepare a new batch.
Adjusting the pH of your water is probably more involved than most hybridizers care to get. Hostas are tolerant of a wide range of pH levels and the results of adjusting the pH may not be worth the extra effort.
Fertilizing Hosta Seedlings
Hosta seedlings are not fussy when it comes to fertilizer. Whatever brand and ratio you have on hand will likely serve the purpose. Miracle-Gro, fish emulsion, and house plant fertilizer are just a few of your choices.
Every hybridizer has a different method of fertilizing. Some may fertilize at half the recommended rate twice a month. Others fertilize at 1/4 strength every time they water their seedlings. This ensures the seedlings always have a constant, though mild, source of nutrients.
Fertilizing heavily will result in weak, soft growth and burnt leaf edges. Very young Hosta seedlings should never be fertilized with full strength fertilizer to avoid burning their delicate roots. It may even be a good idea to wait until the seedlings have at least two leaves before fertilizing at all.
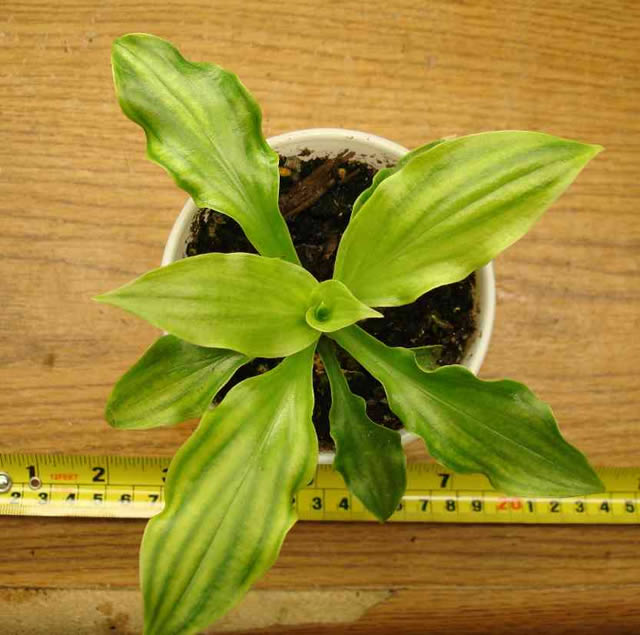
Re-potting Hosta Seedlings
Many types of seedlings are set back after a transplant. This is not true of Hosta seedlings. In fact, transplanting almost always stimulates a growth spurt in Hosta seedlings. Shaking the old growing mix from the roots does no harm at all and some growers claim it helps stimulate new growth. Hosta hybridizers often re-pot seedlings every six to eight weeks to encourage strong, continuous growth.
The first transplanting can be done once the seedlings have three to four leaves and are easy to handle - usually six to eight weeks from being planted. At this stage, the Hosta seedlings can be transplanted from their "community pots" into small, individual pots or cells. Less crowded "community pots" of two to four seedlings are also an option.
An appropriately sized pot should be chosen at each transplant. Use the root mass of the seedling as a guide. The more roots, the bigger the pot needed. An appropriately sized pot will allow room for six to eight weeks of growth, without becoming seriously root bound.
Standard nursery pots are perfectly acceptable for growing Hosta seedlings, but some hybridizers find cheap, plastic cups more convenient. Drainage holes will need to be punched into the bottom edge of the cups. An Exacto knife or even a red-hot nail will do the job.
Some very accomplished hybridizers go so far as to plant in inverted cups. The theory behind this is that inverted cups mimic the natural shape of a Hosta root system. To do this, the bottom of the cup needs to be completely removed. Accompanying lids act as the bottom and hold the growing mix in. Again, drainage holes will need to be punched in the lids.
Transplanting from inverted cups (dubbed "up-cupping") could not be easier. Just remove the lid, gently gather the leaves together, and the wider base allows the plant to slide right out. Inverted cups also have the advantage of being more stable than upright cups. An important consideration when moving flats of top-heavy seedlings.
- Introduction to Hybridizing Hostas
- Selecting Parent Plants
Goals, Fertility, Bloom Period - Hosta Genetics
- The Mechanics of Hybridizing Hostas
Flower Anatomy, Preparing & Protecting Flowers
Collecting & Storing Pollen, Transfering Pollen, Marking Crosses, Keeping Records - Hosta Seeds
Harvesting, Cleaning, Storing - Starting Hosta Seeds
Planting Containers, Planting Medium, Moisture, Heat, Germination Time - Growing Hosta Seedlings
Light Type, Photoperiod, Reflecting Light, Water, Fertilizer, Re-potting - Problems Encountered While Growing Hosta Seedlings
Damping Off, Fungus Gnats - Hardening Off & Moving Seedlings Outdoors
- Culling and Selecting Hosta Seedlings
- Hybridizing Resources
All content and images © 2026 by In The Country Garden & Gifts unless otherwise noted.